Phone
Phone  Email
Email


- Trophies and sustainability
Personalized stone and marble trophies: which technique suits each material
With stone, the material decides the technique. Every stone has its own color, porosity and finish, and these determine which type of personalization it accepts and how the result will look.
This guide explains how stone trophies, marble trophies and limestone trophies are personalized, and which technique works best on each one.
Contents
- What is a solid stone or marble trophy?
- Why the material decides the technique
- Three natural stones: color and surface of each
- Black and white marble: veining and polish
- Light, porous limestone: the ideal base for color
- 1. Which technique each stone accepts
- 2. Laser engraving on stone and marble
- 3. Laser + pigmentation
- 4. Full-color UV printing
- 5. Techniques for custom projects
- 6. Preparing your file and caring for your trophy
- In summary
- Frequently asked questions
What is a solid stone or marble trophy?
A solid stone or marble trophy is carved from a single block of natural stone: the stone is the trophy itself, not a base for mounting another figure.
Why the material decides the technique
Three properties of the stone determine which type of personalization it accepts:
- Color: sets the contrast of the laser mark.
- Porosity: determines how well ink or pigment anchors. Limestone is the most porous of the three stones.
- Finish (polished or matte): the laser alters it, and it affects how well the ink adheres.
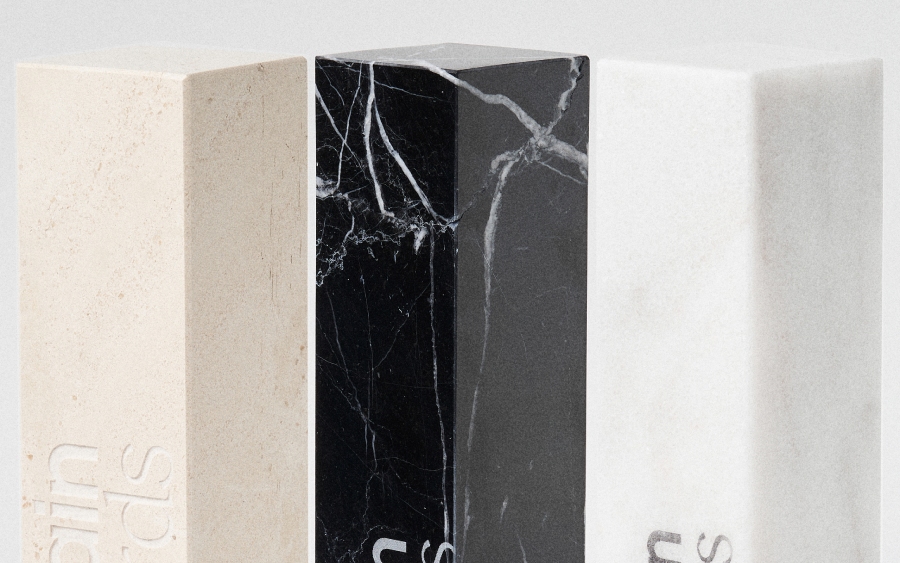
Three natural stones: color and surface of each
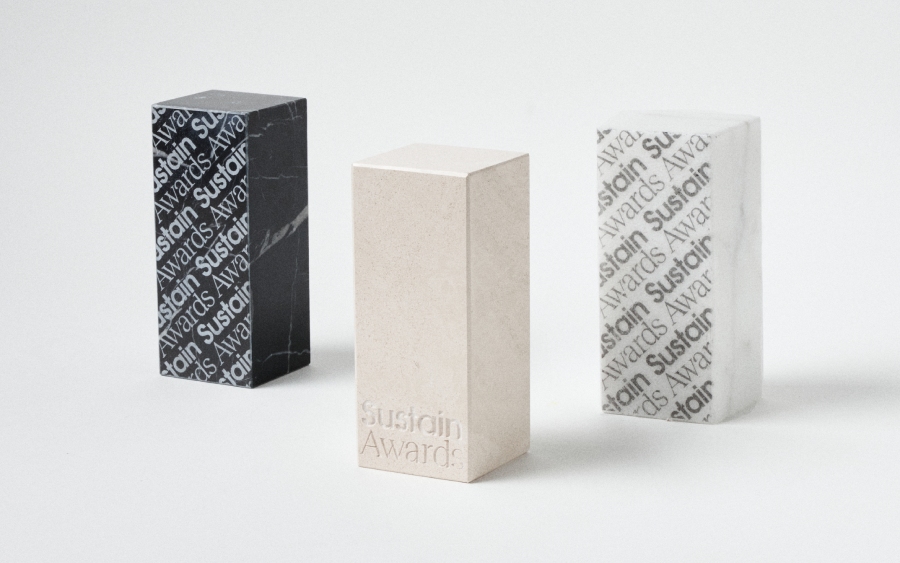
We work with three natural stones in solid blocks:
| Totem | Stone | Color and surface | What this means for personalization |
|---|---|---|---|
| NERO | Black marble | Dark, polished, fine light veining | The laser produces a high-contrast white mark |
| MAR | White marble | Light, polished, gray veining | The laser barely contrasts: a tone-on-tone mark |
| CAL | Limestone | Light, matte, uniform and more porous | A neutral base that takes ink and pigment with true-to-color results |
Because it is natural stone, every piece is unique: the veining, tone and small irregularities vary from one unit to the next and are part of the finish. Personalization adapts to that variation; it doesn't remove it.
Black and white marble: veining and polish
The marble trophies in this guide are NERO and MAR, two marbles with a polished surface:
- NERO: black marble, dark, with fine light veining.
- MAR: white marble, light, with gray veining.
NERO is personalized with laser or UV printing, and MAR with laser, laser and pigment, or UV printing. CNC machining and sandblasting are also available on all three stones for custom orders or orders of more than 10 units.
Full-color UV printing works equally well on MAR and NERO. On NERO, it is much harder to create a compatible design: the black background usually needs a layer of white, and the color can lose brightness. Section 4 covers the details.
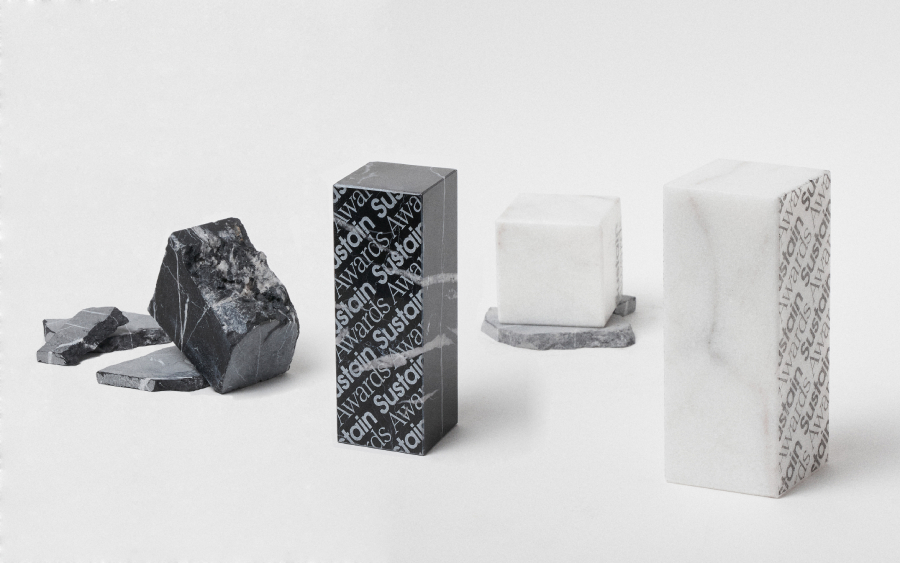
Light, porous limestone: the ideal base for color
The limestone trophies in this guide are CAL, a light, matte, uniform and more porous limestone that provides a neutral base.
It accepts laser, laser with pigmentation and UV printing, which can be combined on a single piece. Its porosity can let the pigment bleed slightly at the edge of the engraving.
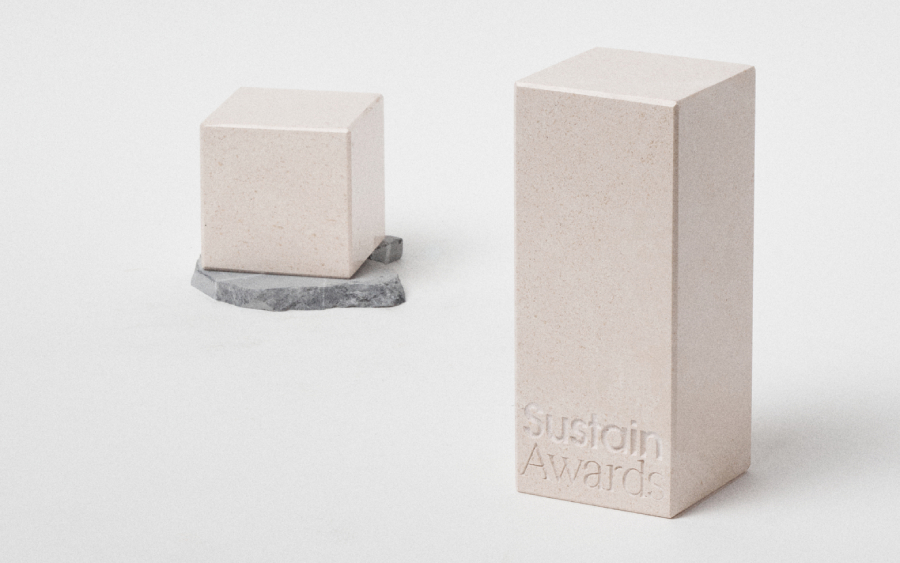
1. Which technique each stone accepts
NERO accepts laser and UV printing, MAR accepts laser, laser with pigment and UV printing, and CAL accepts all three techniques, which can be combined on a single piece.
| Technique | NERO | MAR | CAL |
|---|---|---|---|
| Laser engraving | ✓ | ✓ | ✓ |
| Laser + pigmentation | ✗ | ✓ | ✓ |
| Full-color UV printing | ✓ | ✓ | ✓ |
| Gradients and photographic images | ✓ (UV, more complex design) | ✓ (UV) | ✓ (UV) |
| Accurate brand color | ✓ (UV, more complex design) | ✓ (UV) | ✓ (UV) |
| Multiple colors on one piece | ✓ (UV) | ✓ (by zone with pigment; UV) | ✓ |
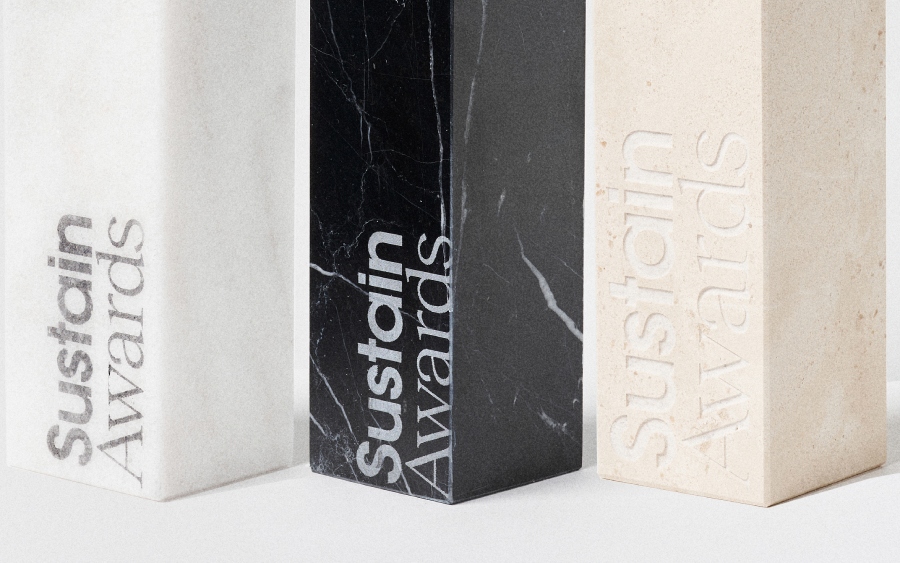
| Stone | Typical result |
|---|---|
| NERO | White mark on black. The maximum contrast the stone can give without adding material |
| MAR | Laser: tone on tone, very subtle. With pigment: color and contrast in flat areas |
| CAL | From an understated engraving to a full-color image, or both at once |
What to choose based on what you're after
| If you want | Stone and technique |
|---|---|
| Maximum contrast, no color | NERO with laser |
| Subtlety, an almost invisible mark | MAR with laser |
| A logo in one or two flat colors | MAR or CAL with laser + pigmentation |
| Brand color, gradients or an image | CAL or MAR with UV printing; NERO too, with a more complex design |
| Understated engraving plus a color logo | CAL with laser + UV on the same piece |
| Relief, volume or deep engraving | CNC (custom or more than 10 units) |
| A uniform matte background on a polished surface | Sandblasting (custom or more than 10 units) |
2. Laser engraving on stone and marble
This is the most common technique on stone. A laser beam heats the surface in a fraction of a second and micro-fractures it: the engraved area loses its polish and scatters light, which is why it looks lighter and more matte than its surroundings.
How it looks on each stone
You don't choose the color of the mark: the stone does. The laser adds no material; it only transforms the surface.
| Stone | Mark color | Contrast | Assessment |
|---|---|---|---|
| NERO | White or very light gray | High | Crisp, elegant result; the benchmark technique |
| MAR | Matte white on polished white | Low | Discreet, readable in raking light; a good fit if you want subtlety |
| CAL | Slightly lighter or darker tone | Very low | Almost imperceptible on its own; used as the base for pigmentation |
Characteristics
| Aspect | Details |
|---|---|
| Depth | Shallow, on the order of tenths of a millimeter. Feels like a light texture to the touch |
| Durability | Permanent: it is part of the stone, so it won't wear away or peel off |
| Detail | High, but very fine lines can get lost in the veining or pores |
| Color | No color control and no gradients |
Limitations worth knowing
- Veins don't disappear: if a light vein runs through the logo on NERO, contrast drops at that point.
- Halftones and photographs can be simulated with dots, but the result is monochrome and less sharp than in print.
- As a rough guide, strokes thinner than 0.3 mm and very small text lose legibility.


From engraving to relief, the material decides the technique.
From the vein to the logo, every trophy is different.
Discover our stone trophies3. Laser + pigmentation
In laser + pigmentation, the pigment is applied over the laser engraving, and the engraving acts as a mask.
It adds color where the laser alone doesn't give enough contrast. It is used on MAR and CAL.
How it works
- The laser engraves the design and opens up the surface.
- Pigment is applied over the area.
- The surface is cleaned: the pigment wipes off the polished stone and stays fixed only in the engraving, which acts as a mask.
- If there are several colors, the process is repeated zone by zone.
Characteristics
| Aspect | Details |
|---|---|
| Color | Each zone is a single flat color |
| Gradients | Not supported |
| Tone matching | Close to the reference, not an exact Pantone match |
| Multiple colors | Possible, in separate zones of the design |
| Durability | High: the pigment is protected inside the engraving |
| Finish | Matte color sunk into the surface; looks built into the stone |
Why not on NERO
On NERO, the laser already gives the maximum possible contrast, in white. A colored pigment on a black background loses intensity and doesn't improve the result.
Limitations
- Very small areas or very thin strokes hold less pigment.
- Two colors that sit too close together can run into each other, so leave some space between zones.
- On the more porous CAL, the pigment can bleed slightly at the edge of the engraving.
4. Full-color UV printing
This is direct four-color process printing (CMYK, with white when needed) onto the stone. It can reproduce any design with photographic quality: color logos, gradients and images. It can be applied to all three stones.
Key terms
- Four-color process (CMYK): the color base of UV printing, with a layer of white when the design calls for it.
- Spot inks (fluorescent and metallic): special inks that can't be reproduced, because color reproduction starts from CMYK.
- Primer: seals the pores of the stone and creates a base for the ink to anchor to.
- Protective varnish: protects the ink from abrasion, moisture and light, and extends its life.
How it works
An inkjet printer deposits microdroplets of ink onto the surface and a UV lamp cures them instantly: the ink goes from liquid to solid without any solvents evaporating. The result is a thin layer of ink on top of the stone, not within it.
The full process
| Step | Purpose |
|---|---|
| 1. Cleaning | Removes dust and grease that would prevent adhesion |
| 2. Primer | Seals the pores of the stone and creates a base for the ink to anchor to |
| 3. UV printing | Lays down the color; a white underlayer first if the design requires it |
| 4. Protective varnish | Protects the ink from abrasion, moisture and light, and extends its life |
The finish of the stone affects durability: a porous or very smooth surface anchors ink less well. That's why the primer and varnish aren't optional but part of the technique.
Characteristics
| Aspect | Details |
|---|---|
| Color | Full color, with the closest match to brand color of the three techniques |
| Gradients and images | Yes, with photographic quality |
| Relief | None: a flat layer on the surface |
| Durability | Good with primer and varnish; as it sits on the surface, it is the technique most exposed to abrasion |
UV printing on each stone
UV ink is translucent: the background shows through it. The light, matte, uniform limestone gives a neutral base and reproduces color faithfully. MAR and NERO take UV printing equally well. On NERO, it is much harder to create a compatible design: the black background usually needs a layer of white, and the color can lose brightness.
Limitations
- Color reproduction starts from CMYK, so special spot inks (fluorescent, metallic) can't be reproduced.
- The natural tone of the stone slightly affects very light colors.
- Because the ink sits on the surface, avoid contact with hard objects and abrasive cleaning products.
5. Techniques for custom projects
CNC and sandblasting are reserved for custom orders or orders of more than 10 units: they require programming, tooling or masks made specifically for each design. They apply to all three stones.
For custom trophies and runs of more than 10 units, preparation varies by technique: sandblasting needs a mask for each design, and CNC needs programming and tooling.
CNC / machining (milling, deep engraving)
A CNC milling machine removes material with diamond tools, following the design file. It's computer-guided sculpture.
| Aspect | Details |
|---|---|
| What it allows | Deep V-engraving, bas-relief, raised logos, recesses, custom shapes and volumes |
| Depth | From millimeters to several centimeters |
| Finish | Real feel and shadow: the design reads through light, without color |
| Can be combined with | Pigmentation at the bottom of the engraving (MAR, CAL) |
| File | Vector for engraving; 3D model for reliefs and shapes |
| Limitations | Minimum tool radius: inside corners are slightly rounded and very fine detail is limited |
Sandblasting
The stone is covered with a mask cut to the design and abrasive is blasted at it under pressure: the exposed area is eroded while the protected area stays intact.
| Aspect | Details |
|---|---|
| What it allows | Engraving of uniform depth with a matte background, on flat or slightly curved surfaces |
| Finish | Matte contrast on polished, smooth texture and clean edges |
| Depth | Controllable through exposure time, usually from fractions of a millimeter to a few millimeters |
| Can be combined with | Pigmentation of the sandblasted background |
| Limitations | Coarser detail than laser or CNC; needs a mask for each design |
Comparison of techniques with depth
| Laser | Sandblasting | CNC | |
|---|---|---|---|
| Depth | Shallow | Medium | High |
| 3D relief | No | No | Yes |
| Fine detail | High | Medium | Medium-high |
| Preparation | None | Mask | Programming and tooling |
| Minimum order | 1 unit | More than 10 or custom | More than 10 or custom |
6. Preparing your file and caring for your trophy
What file we need
| Technique | Format | Recommendations |
|---|---|---|
| Laser | Vector: AI, PDF, SVG, EPS | Text converted to outlines; a single color; avoid very thin strokes |
| Laser + pigmentation | Vector | Each color on its own layer; give a color reference (Pantone or swatch), keeping in mind that matching is approximate; leave space between zones of different colors |
| UV printing | Vector, or image at 300 dpi at final size | CMYK; Pantone reference for the brand color to fine-tune the conversion |
| CNC | Vector or 3D model (STEP, STL) | Specify the desired depth or relief height |
| Sandblasting | Vector | Clean shapes; avoid very fine detail |
If you only have your logo as a low-resolution image, we can vectorize it before production.
File terminology
- Vector: an image format built from mathematical paths that scales up without losing sharpness, as opposed to an image made of pixels.
- dpi: dots per inch, the measure of an image's resolution.
- Text converted to outlines: text turned into vector shapes, so it no longer depends on the font installed.
- Pantone: a system of numbered color references used to specify a brand color.
- STEP and STL: file formats for 3D models.
Caring for your trophy
| Technique | Care |
|---|---|
| Laser, CNC, sandblasting | Permanent. Clean with a soft cloth and water; avoid acids (vinegar, limescale removers), which attack marble and limestone |
| Pigmentation | Same as the stone; avoid solvents on the colored area |
| UV printing | Soft cloth, dry or slightly damp; no scouring pads or abrasive products |
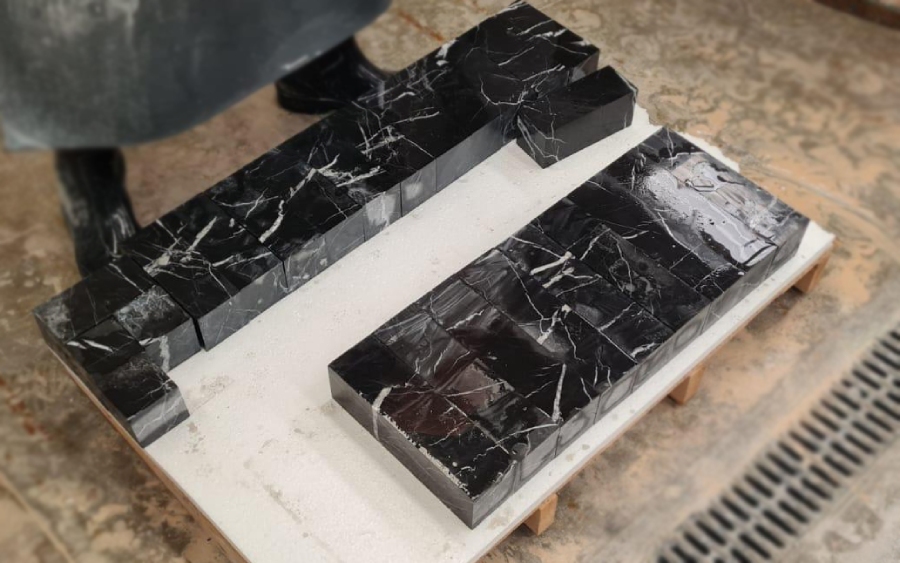
From engraving to relief, the material decides the technique.
From the vein to the logo, every trophy is different.
Discover our stone trophiesIn summary
- The material decides the technique: the color, porosity and finish of each stone determine which type of personalization it accepts.
- NERO is personalized with laser or UV printing, MAR with laser, laser and pigment, or UV printing, and CAL with laser, pigment and UV printing, all combinable on a single piece.
- Custom orders or orders of more than 10 units add CNC and sandblasting, with a mask or programming specific to each design, on all three stones.